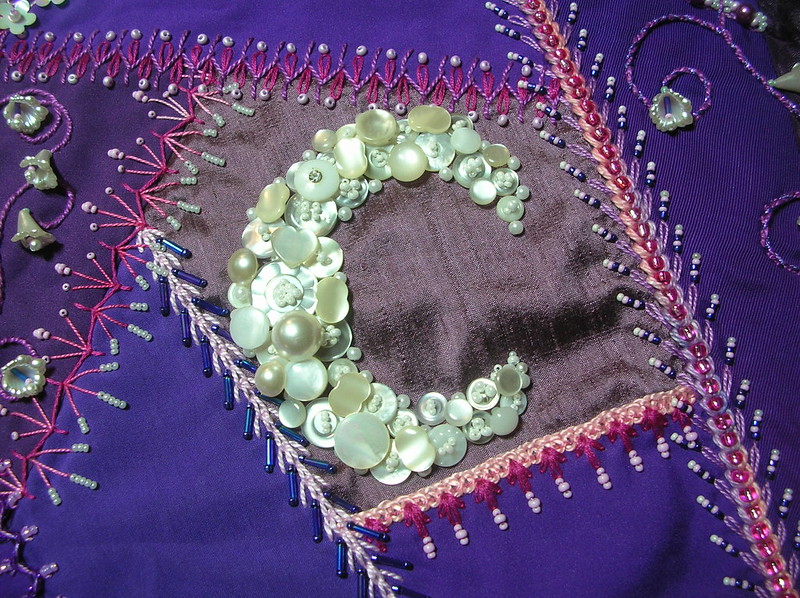
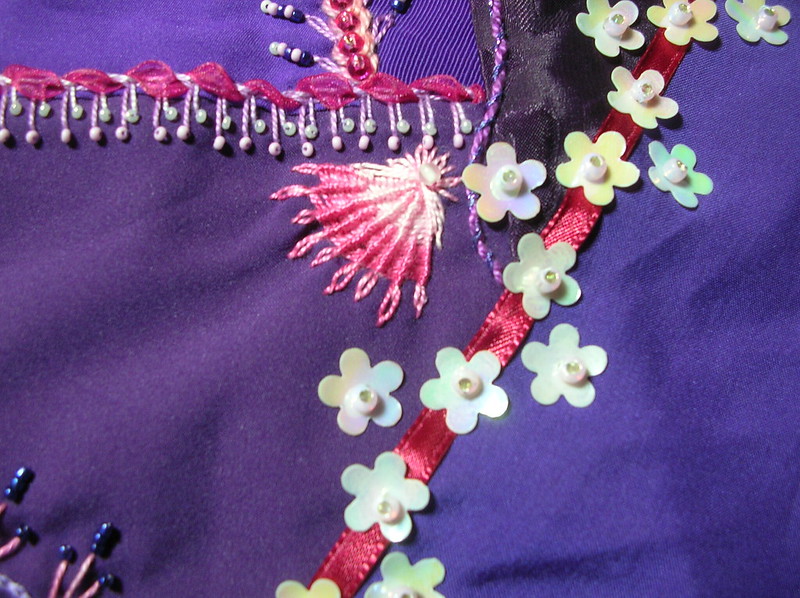
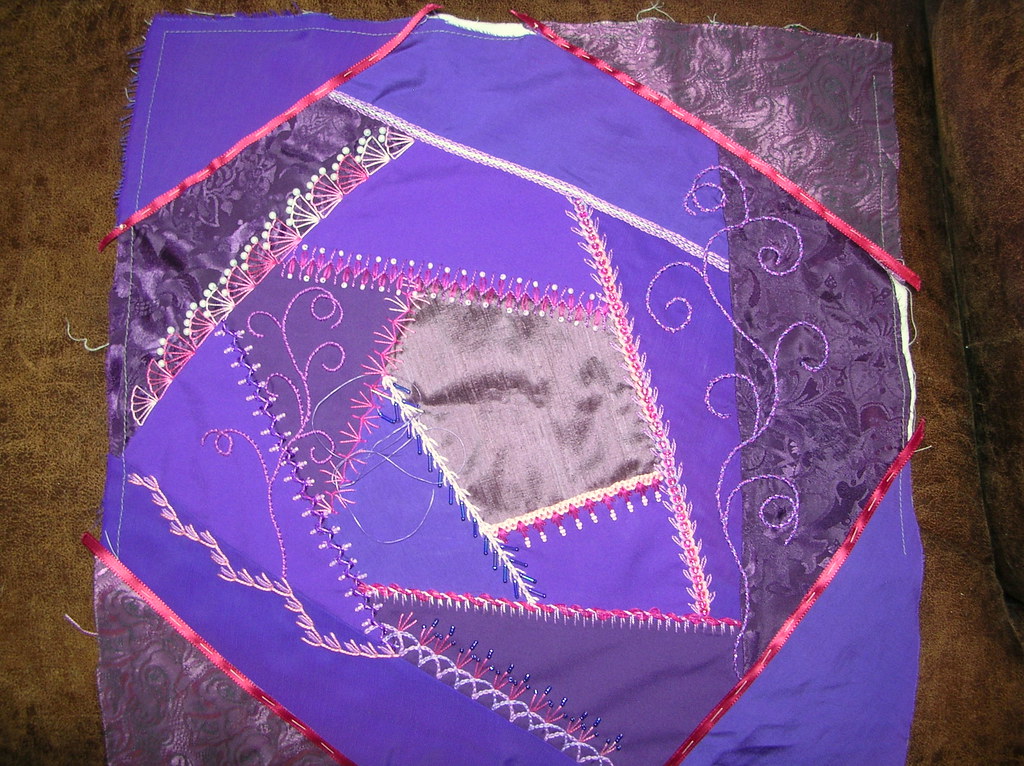
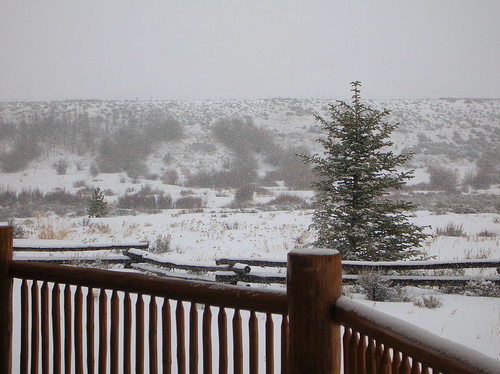
I decided before I embarked on a big new project, I should do some actual crazy quilting to get back in the swing of things. So I got a block put together for Chloe, my second granddaughter. I made a block for Sophia, my first granddaughter, some years ago (it's the background on my blog) so I figured I better get with it and do one for Miss Chloe. Her room is purple and pink so I went with that as a color scheme. Unusual for a girl I know, but... ;0) Anyway, when I was sorting buttons while organizing my sewing room I discovered I have a HUGE amount of white buttons so I'm going to use quite a few on this piece. It's coming along well and I'm quite pleased.
******
I've been doing quite a bit of research on Medieval embroidery, textiles, images, themes and culture to prep for the Medieval CQ. During my search I came upon a few blogs dealing with Medieval textile and embroidery, if you would like to take a peek.
http://bethsbluebellwood.blogspot.com/ She is doing an exhaustive examination of various embroidery stiches used during the medieval and later periods.
http://elmsleyrose.blogspot.com/ An embroidery, calligraphy and illumination blog. She is especially interested in 16th and 17th century embroidery but the illumination comes from earlier periods.
http://gina-b.blogspot.com/ This is a silkwork and passementerie blog out of the UK.
http://m-silkwork.blogspot.com/ A group blog about textiles and costumes of the late middle ages and early modern times.
http://baroqueembellishments.blogspot.com/ She is an embroiderer and pattern maker mostly interested in the Elizabethan and Renaissance eras.
On
a post in July on Baroque Embellishments Kimberly was all excited about discovering an online copy of a book, published in 1606, by ThomasTrevelyon (or Trevelian).It was pretty exciting to me, too! It is on the
Folger Shakespeare Library website and, beginning on page 7 (scroll down) there are quite a few pages of designs for blackwork embroidery. A later edition (1616) is described on
Maggs Rare Books and contains a quite extensive history of Thomas and descriptions of his books.
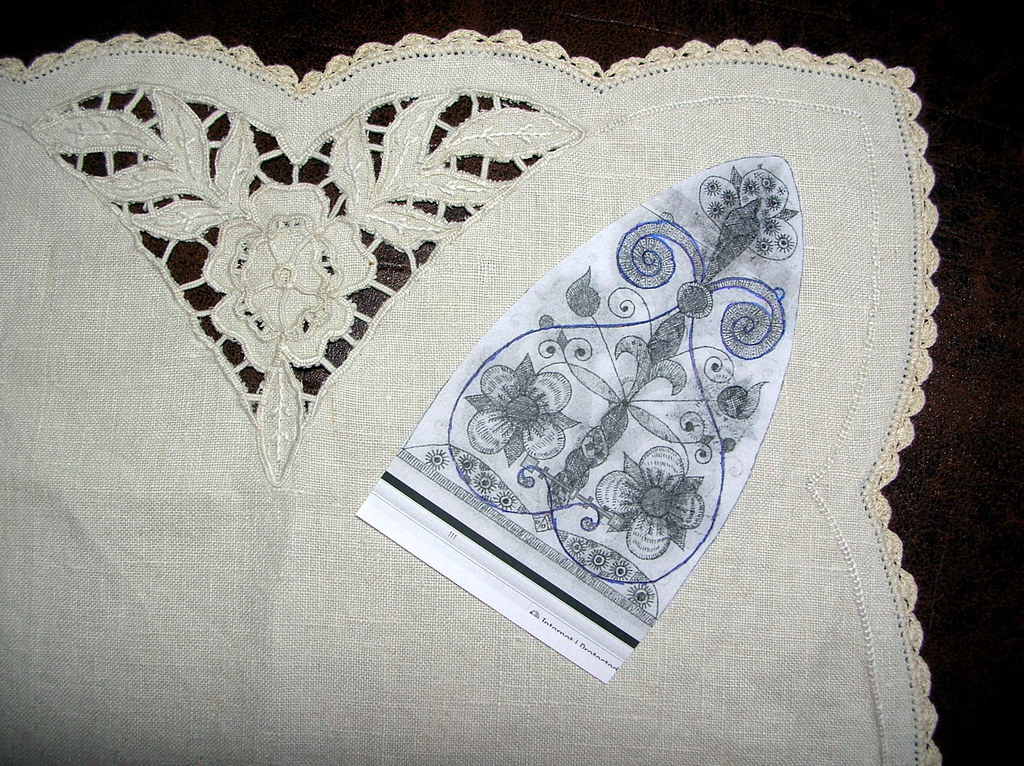
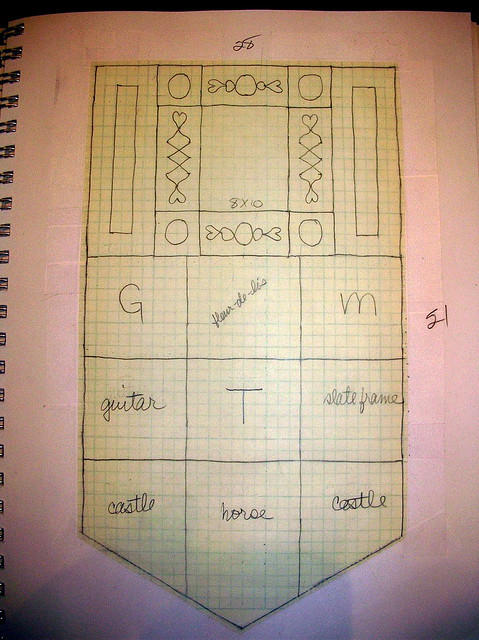
It was in this book that I finally distilled the design I wanted on the focal piece. On this
design for a coif (cap) I found the perfect shape for the corners of the focal piece, with the added bonus that it incorporated a fleur-di-lis, an image I wanted to have on the final CQ banner.
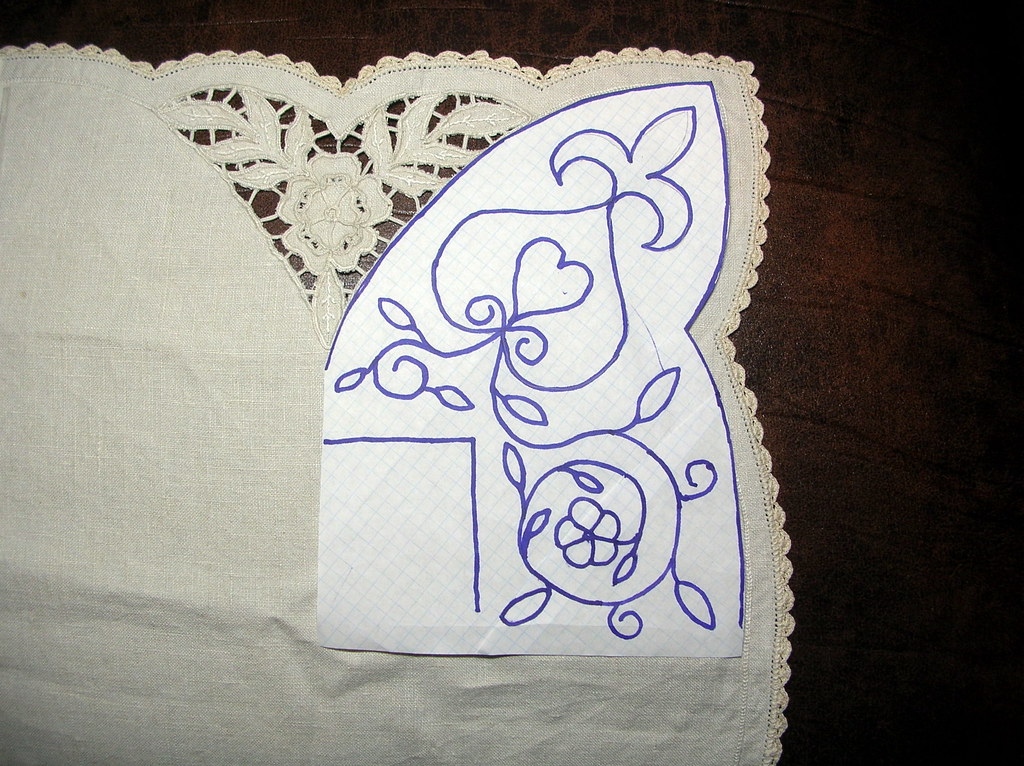
I simplified the design for ease of transfer and then, primarily using the
swirling vines from this image, I came up with this design for one quarter of the piece:
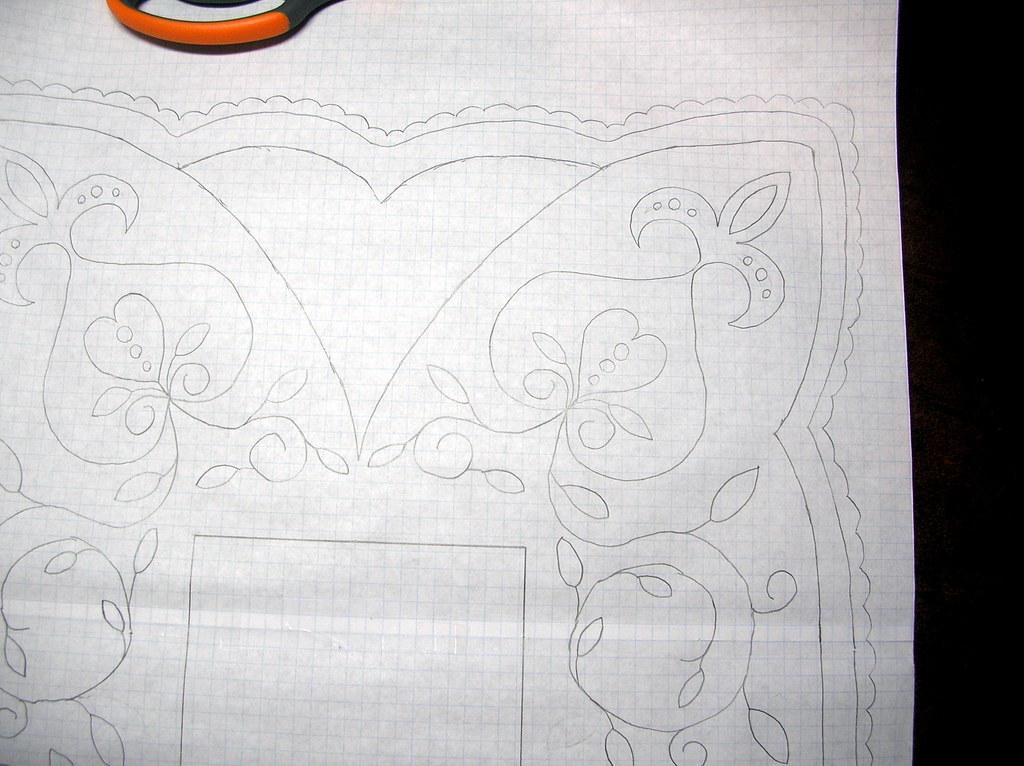
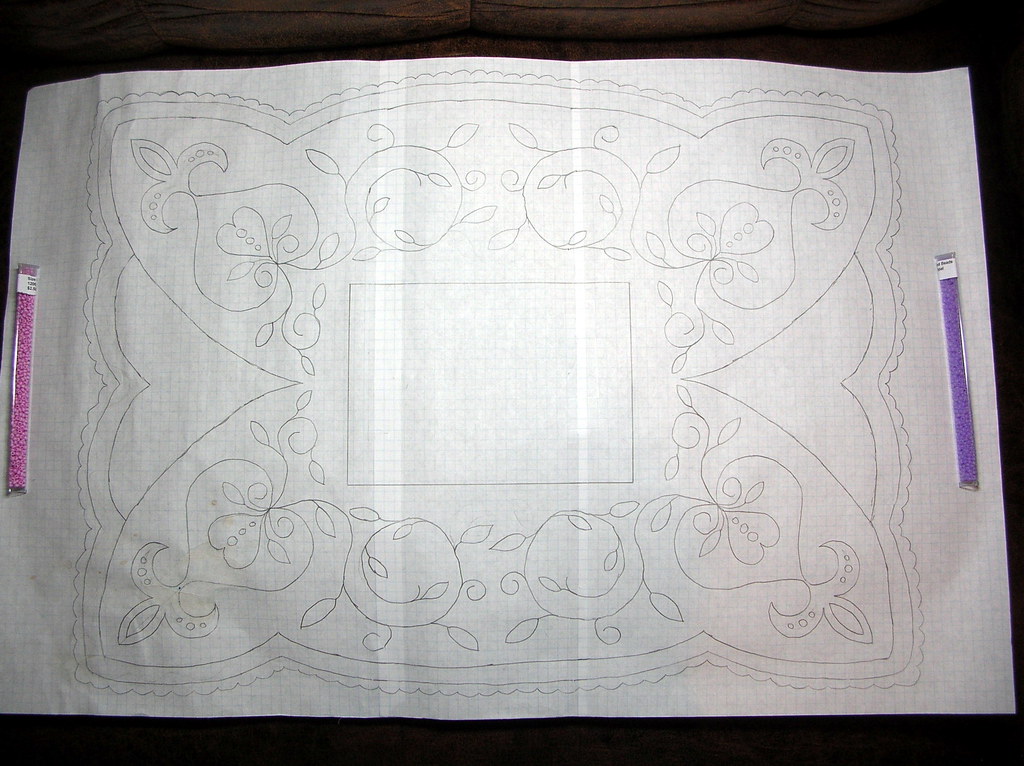
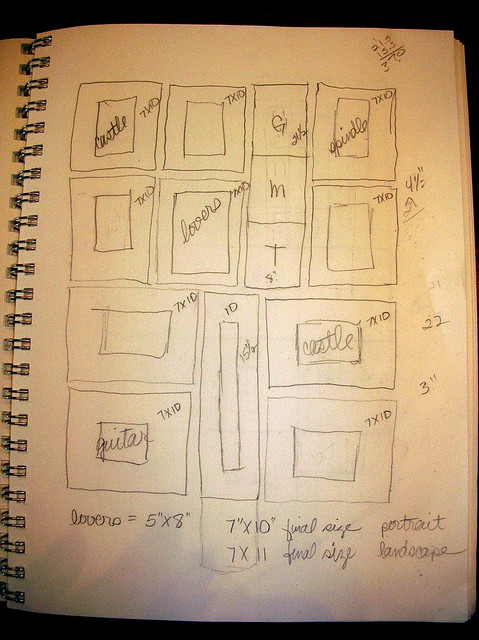
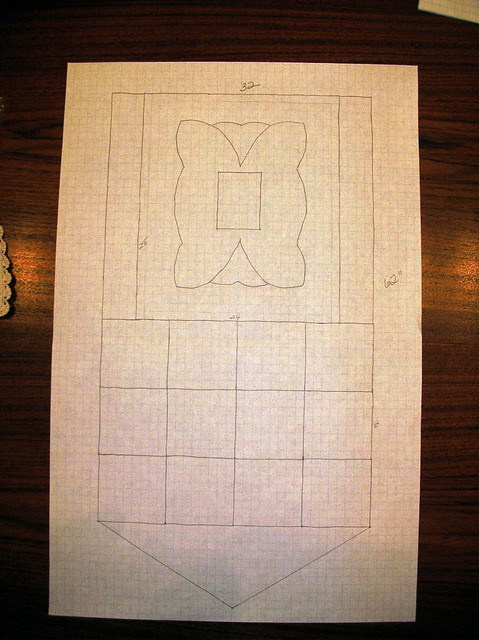
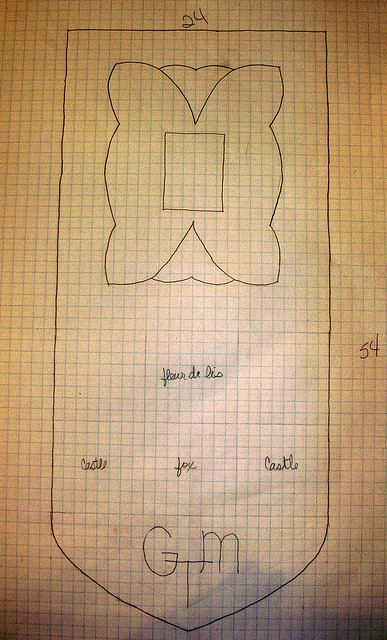
I traced the focal piece on to some graph paper and then transferred this design to all four corners of the outline on the graph paper.
It needed some adjusting but I played with it for awhile and this is where it stands now:
I like it!!