Hey, ladies... how's it going out there in blogland? It's been an interesting week at our house. Neither one of us have been sleeping well... lots of aches and pains and general tossing and turning. Probably just age catching up with us (again) but it's getting old! No pun intended!
To top it all off, at 3:05 on Thursday morning the air conditioner had a screaming hissy fit and died. This is a very old A/C unit... we've had it fixed two times in our year here, already... this is the third (it's so old the A/C guys have never seen one like it!). I called the house warranty folks first thing in the morning and told them we needed a repair call. Unfortunately, they give the A/C repair guys two days to show up for the repair, so of course they used every minute of those two days! Before we left for work we made sure all the blinds were closed, the fans were on and all the electronics were unplugged but it didn't do much good. At 109°F (about 43°C) it was VERY hot outside so by the time we got home Thursday evening, it was 86° in the house. Gah! We kept everything but the fans and the TV off and tryed not to move... it felt like I was sleeping in a sauna with all the humidity from the thunderstorms added to the heat.
The repair guys finally showed up late Friday afternoon. Apparently the poor old motor had vibrated one of its screws completely out of the mounting. They got it fixed but by that time it was even hotter. My plans to get laundry done Thursday and Friday evening after work went out the window. So did anything but sandwiches for supper! Anyhoo... the air conditioner was cranking and pouring out nice cold air but it didn't cool back down to a manageable level until about 3am... another nasty, hot night!
Needless to say, the weekend was spent catching up on laundry and sleep. I had planned to get some piecing done on the Midsummer Night CQ but it didn't get done. I got the threads and beads from the Sumptuous Surfaces class put away and the cutting table cleared off, though, so the playing field is free! I also sat and took the final sketch and laid it out on graph paper so I could finalize the size of the outer blocks. I'm starting with the outer blocks because I can do them while waiting for Nat to finish the center panel.
So, I announced to Glenn last night that I was going to spend the upcoming three-day weekend sewing so there should be some progress soon. I have to announce it so I'll actually do it... I always feel guilty for taking time to do something just for me! It doesn't matter to Glenn, he's happy as long as I'm happy, but my inner German hausfrau has to be firmly put in place occasionally or I'd never do anything just for me. ;0)
Now, since I simply can't have a post without a photo, here's what our front yard looks like every two weeks. We live in a part of Phoenix that was developed in the 1950's and are lucky enough to still have flood irrigation:
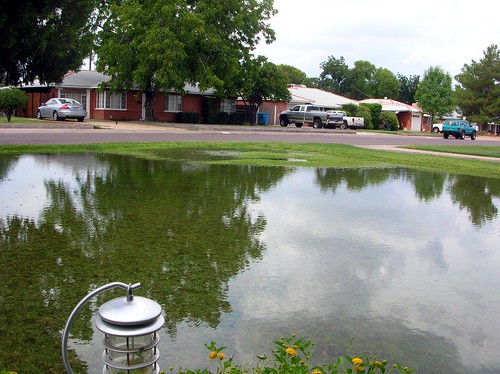
The birds love it... here's the backyard after it has soaked in a bit:
It's MUCH better than hauling around a hose and setting up sprinklers!!
Also... in case you didn't already know, Sharon B has a new address for her blog... she pulled up stakes and headed over to Wordpress... The good lady and all her wisdom can be found RIGHT HERE!
Monday, August 27, 2007
Monday, August 20, 2007
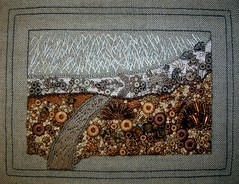
Monochrome Landscape Complete
I finished the first piece for the Sumptuous Surfaces class this weekend.
Actually, it will be the first and only, since the class is now over. I think I'll continue on my own, though. I've had an idea in my head for a year or so that I was going to try and do in CQ but I think it will lend itself more readily to freeform embroidery. I'll probably do it along with the Midsummer Night CQ as a break from the darker colors that will predominate in that piece. We'll see what happens!
Speaking of the Midsummer Night CQ, Nat is ready to start actually painting so, hopefully, I'll have a centerpiece to work off of soon. Procrastination comes to him naturally, I'm afraid... I'm the Queen and he is the Prince. When we are unsure of ourselves, we just don't do it! Anyhoo, I'm going to start on the outer blocks this week 'cause I can't wait any longer! ;0) I hope to have some progress to show you later this week.
Wednesday, August 15, 2007
How to cover a donut bead
I've been asked to post about how I covered the donut beads in my landscape so here's a tutorial on how I do it. The pictures are rather large but this way you don't have to keep clicking back and forth for a close-up look.
OK... covering a donut bead is really simple; however, there are several points to remember that will ensure you have a nice, even result.
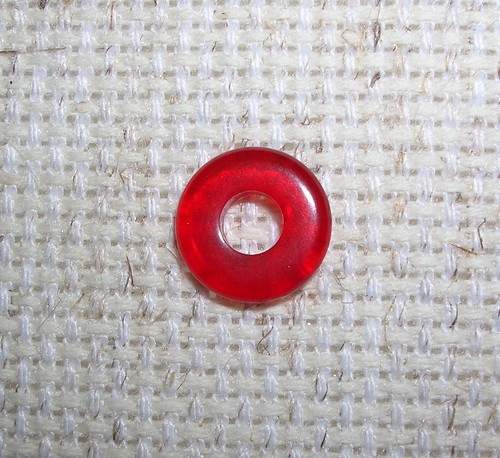
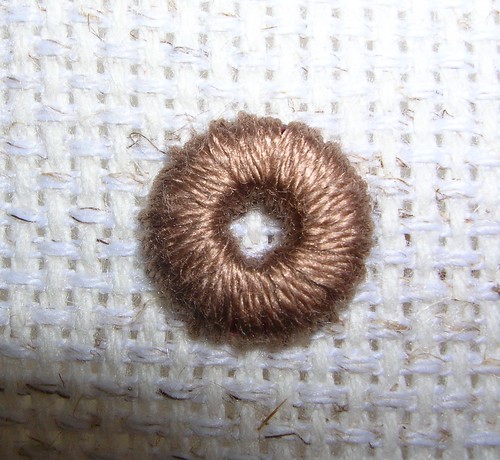
Start with a donut bead (obviously), this is a red glass one, but in the end the color won't matter.
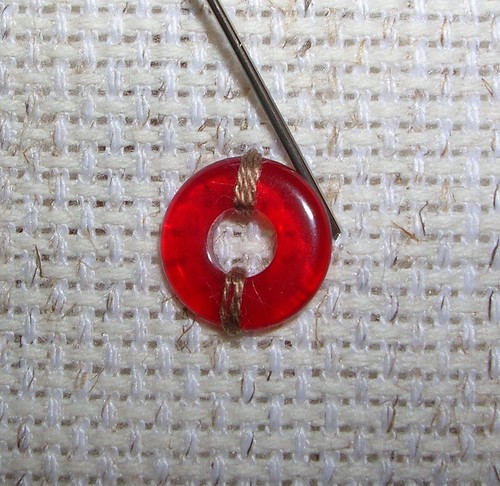
I use three to four strands of floss so coverage doesn't take forever. Starting on the outside of the bead, bring the needle up through the fabric as close to the bead as possible, then bring it back down in the center of the bead, again as close to the bead as possible. Remember to not let your threads twist, since the twisted thread won't lay flat and will affect the looks of the finished piece.
Work each stitch across the bead from each other so your bead ends up where you want it, and so everything ends up even. I usually start at the 12 o'clock position, then move on to the 6 o'clock position, then 9 o'clock and 3 o'clock, successfully.
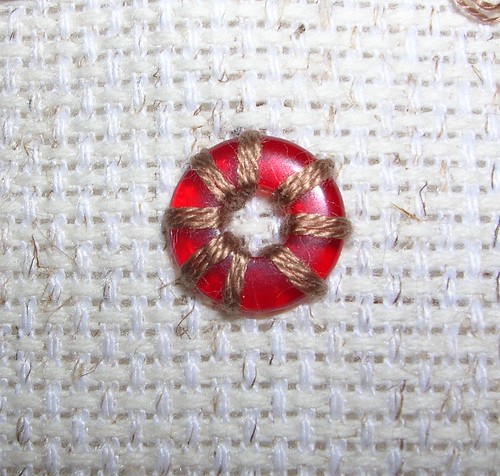
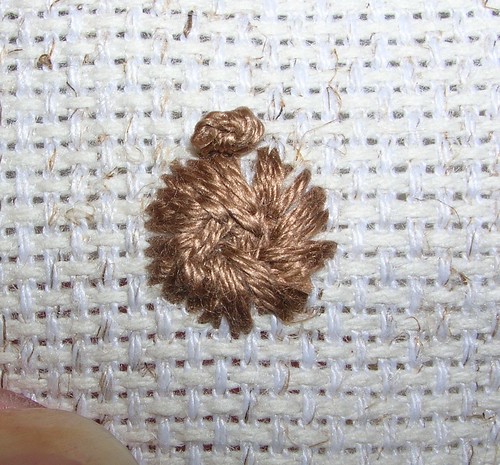
Continue around the bead, taking a stitch approximately in the center of each uncovered portion, working around the bead. Continue placing each stitch in the center of the next two until you have the bead fairly well covered. I work on around the bead, placing stitches back and forth and moving from side to side so everything comes up very even.
Continue on around the bead until you have it covered, like this. Looks pretty good, yes?
But wait... look at the edge of the bead...
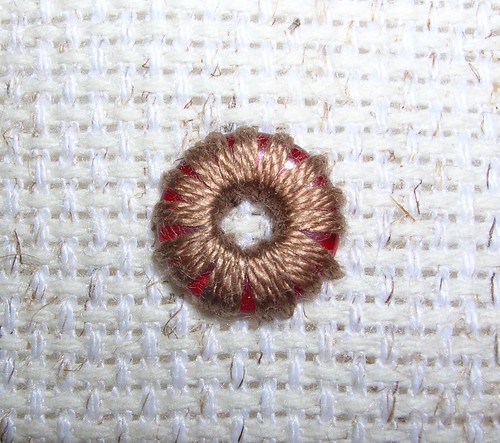
We're not finished yet. Once again, go on around the bead and place a stitch at each uncovered section that is still visible, until it is finally covered.
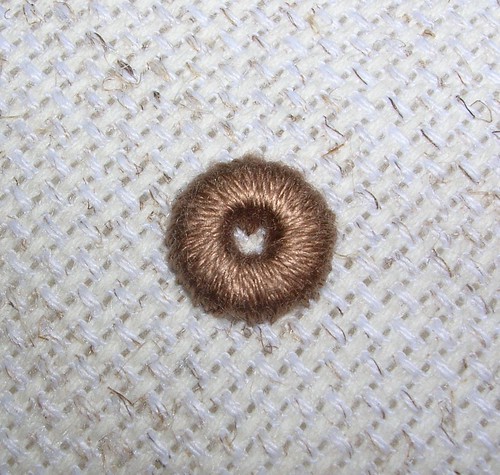
Here is the completed top of the bead. If you'll notice, I didn't get close enough to the inside of the bead on a couple of stitches, so it's a bit uneven in the center.
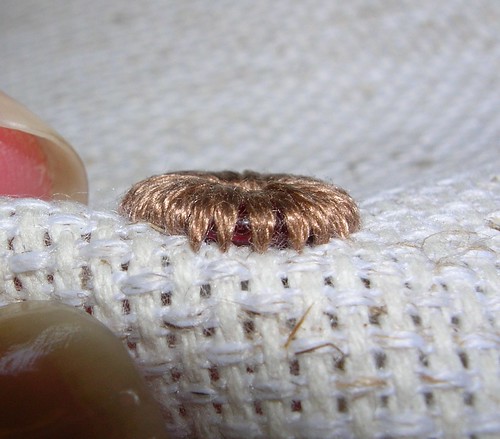
Here is the the side...
and just for good measure... the back!
So, there you go, ladies... everything you ever wanted to know about covering a donut bead. Have fun!!
PS If I haven't explained it enough so you get good, even coverage, let me know and I'll try to 'splain it better.
Monday, August 13, 2007
Progress on several fronts...
Thanks for all the encouragement in the comments... ya'll are the best! Kisses to everybody... ;0)
Harry Potter:
I finished the Harry Potter series... great final book... all I'll say is that reading how Molly Weasley channeled Sigourney Weaver from Aliens just made my day!!
Sumptuous Surfaces class:
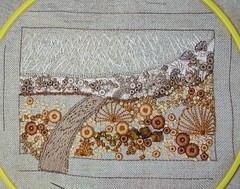
Here is my progress on the monotone piece for the Sumptuous Surfaces class :
I'm close to the final stages of the near hills. It has taken many hours to get to this point but I've loved every minute of it!
I am using several visual tricks on this piece to give the illusion of perspective.
The hills that are farther away get the cool tones, with less intense, lighter colors; while the near hills get the warmer tones, with higher intensity, darker colors to bring the eye forward. So far I think it is working nicely. I'll be glad to get it finished so I can start on my color piece!
Midsummer Night Crazy Quilt:
Nat is having some problems with the paints he's using for the center panel... he can't get them to work just right and it's rather frustrating for him. I don't want his creative muse to run away so I told him if he can't get them to work soon, he can just do the painting on canvas and I'll scan it onto silk and use it that way. It will probably be easier to use in the long run, so either way works for me.
Visitor:
Our nephew will be attending Arizona State University (ASU) this year and I'll be picking him up at the airport on Wednesday. He'll be spending that night at our house so we are clearing out the guest room for him. The guest room has become a spot to stash the bits and pieces we aren't sure we'll be keeping so now we have to actually make up our minds on what to do with all of it! Oh, well... it has to be done sooner or later! We're hoping he'll become a semi-regular visitor throughout the school year and we're really looking forward to having him around once in awhile.
Hope you all had a wonderful weekend!
Wednesday, August 08, 2007
Not so much stitchin' goin on!
Between Harry Potter (I'm on the final book), being sick over the weekend, and Glenn shifting his work hours back to days (he's been working the midnight shift for 8 months), I haven't done any stitching... on anything! I always feel guilty when I don't have anything fiber related to post about, so I tend not to post when I'm in a slump. From now on, though, (if you ladies don't mind) I'll post even though I haven't done any stitching... I'm sure I'll find something to ramble on about! Anyway, that's why I haven't posted in the last week. I'm starting to get antsy for the feel of fabric and thread, though, so I'm sure I'll actually have a fiber related post for this weekend. Please just hang around a few more days! ;0)
Subscribe to:
Posts (Atom)