
OK... covering a donut bead is really simple; however, there are several points to remember that will ensure you have a nice, even result.
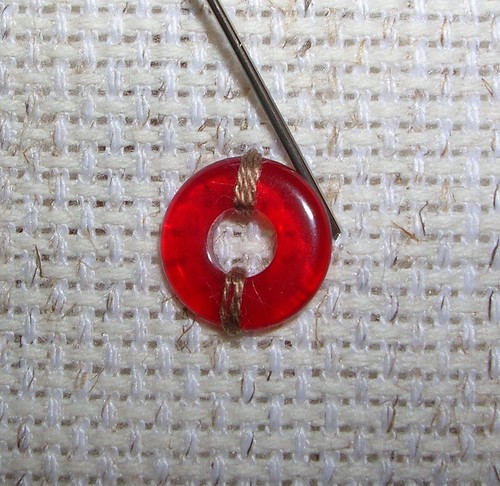
Start with a donut bead (obviously), this is a red glass one, but in the end the color won't matter.

I use three to four strands of floss so coverage doesn't take forever. Starting on the outside of the bead, bring the needle up through the fabric as close to the bead as possible, then bring it back down in the center of the bead, again as close to the bead as possible. Remember to not let your threads twist, since the twisted thread won't lay flat and will affect the looks of the finished piece.
Work each stitch across the bead from each other so your bead ends up where you want it, and so everything ends up even. I usually start at the 12 o'clock position, then move on to the 6 o'clock position, then 9 o'clock and 3 o'clock, successfully.
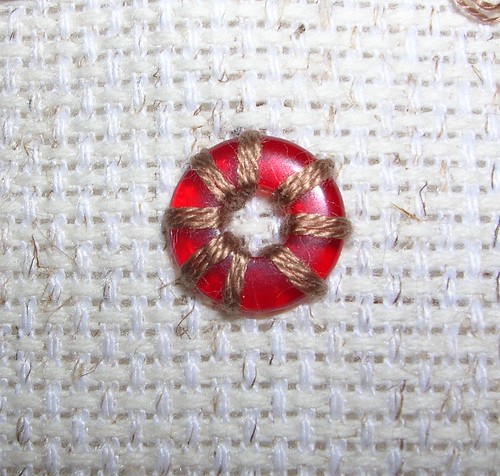
Continue around the bead, taking a stitch approximately in the center of each uncovered portion, working around the bead. Continue placing each stitch in the center of the next two until you have the bead fairly well covered. I work on around the bead, placing stitches back and forth and moving from side to side so everything comes up very even.
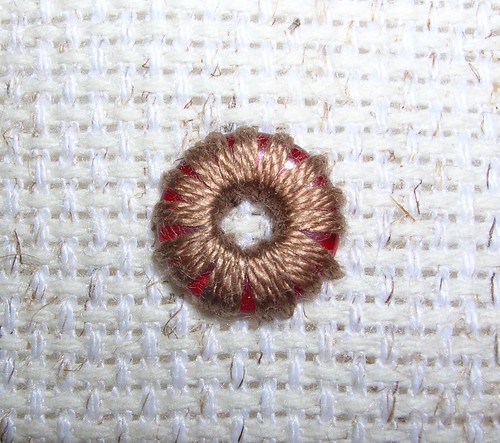
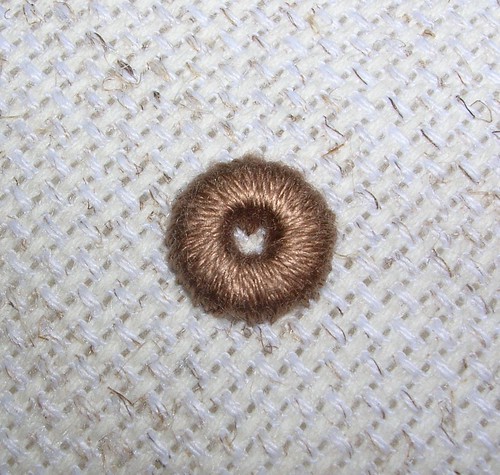
Continue on around the bead until you have it covered, like this. Looks pretty good, yes?
But wait... look at the edge of the bead...

We're not finished yet. Once again, go on around the bead and place a stitch at each uncovered section that is still visible, until it is finally covered.
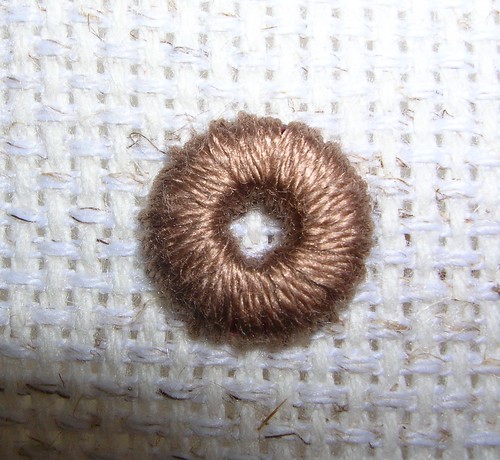
Here is the completed top of the bead. If you'll notice, I didn't get close enough to the inside of the bead on a couple of stitches, so it's a bit uneven in the center.
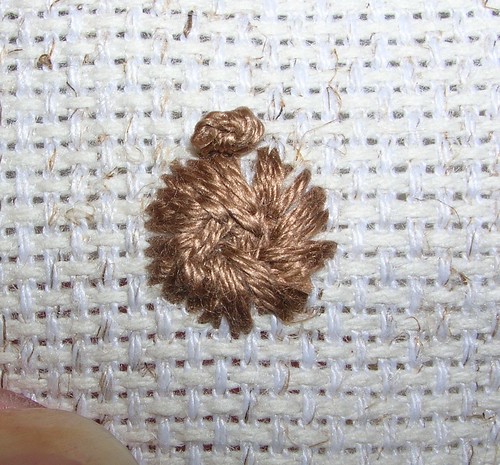
Here is the the side...

and just for good measure... the back!
So, there you go, ladies... everything you ever wanted to know about covering a donut bead. Have fun!!
PS If I haven't explained it enough so you get good, even coverage, let me know and I'll try to 'splain it better.
6 comments:
Thanks, Marty. Looks great, and easy, too!
Great tutorial Marty. It almost makes me want to pick up a needle. Naaaaah....
Marty!
This is a neat thing to try!
Thank you so much. The tutorial is perfect.
Virgi
Seems very well explained and illustrated to me! Thanks!
I wish I embroidered - that looks fun to do. Might just have to find a bead so that I can try it out!
Sue
Very nice! You could always put a bead in the center if that open area bothered you.
Post a Comment