
Sewing every day hasn't been happening; however, creating has! Getting started on the embellishments for the border was very hard. I don't know what the problem was, but I just couldn't get started. I think it was like when an artist stares at a blank canvas and is afraid to get started. It's been awhile since I embellished any of my CQ pieces so that probably had something to do with it!
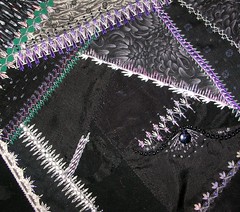
It took me a a couple of days of staring and pulling fabrics and looking at books and looking at beautiful photos on flickr but I finally got started. The first thing I did was take Block 4 (the center block on the bottom) and change it from this (click to embiggen):

to this:
Yup, I took out that strange row of french knots and beads. I liked it; however, it was in the wrong place and just took over that whole area. Now, of course I needed to find something that fit in that area. Since it is the center block, I thought a bunch of grass or leaves or something might work. I went through my hand-dyed fabrics (I didn't dye them, I just bought them) and pulled a really nice, olive green piece and cut out some nice leaves:
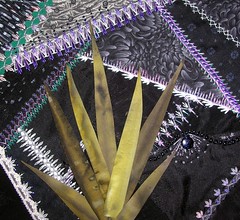
Hmmmm... nice design, nice fabric, not so nice in this application. Olive green is not the right color! So, let's try a nice blue-green:
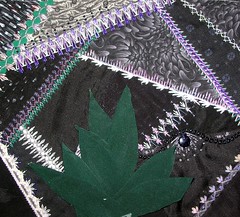
Hmmmm... nice design, nice fabric, not so nice in this application, again. The color is right; however, the camera is picking up more contrast than is actually there, you can hardly see the green leaves in person. I also think it's too stark, although it would make a great agave for a southwestern block! ;0)
Finally, I tried these crocheted leaves that I got at an estate sale last summer:
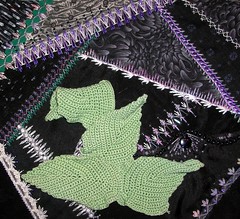
I like these much better as far as shape and texture, but they may be a bit too light in color. I may try and make them a little darker with some fabric paints, we'll see. I'll let them sit awhile and move my focus down to the end of the row of blocks where I want to put some mushrooms. Here is a mockup of some mushrooms cut out of felt:

I really like the dimension the felt gives them, especially with two layers of felt. I decided I wanted to join the layers together off the fabric and then attach them to the block with beads or something. I used buttonhole stitches with perle cotton at first (bottom), but it seemed too heavy, so I went with 2 strands of silk floss (middle). Then I realized that they had more of a folk art look than I wanted. What I wanted was a design more suitable for the world of fairies, something soft and magical... so I came up with the swirls on the top mushroom:
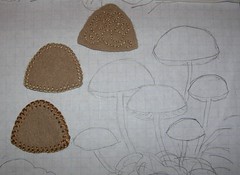
I like the swirls much better, the folk mushrooms will get saved for something else! I'm not sure if the swirls are too close in color to the mushroom, so I may try a different color on some of them tonight. In any case, I did get started on the embellishments! ;0)
That's all for now, take good care of yourselves and I'll talk to you in a few days.
5 comments:
So much patience to get it right, can't wait to see what makes it onto the block
You are much better to experiment than I am with embellishments. I should probably take some lessons!
I like the lighter-color embellishments. They have an ethereal quality. The dark green looked dead, and the gold didn't go at all.
I too have blank-canvas issues these days. I have been making art long enough to not worry about it, these phases come and go.
Have a lovely day.
Those colors and images just POP on the black and white borders...I didn't know you had this in mind and I think it is fabulous!!!!
I really like the swirly idea. Love to see how this is going.
Post a Comment