Wednesday, July 26, 2006

Return to 100 Details in 100 Days

Thanks for the comments on the Tiger Tape Tutorial... I think to some people it may seem over the top to use the tape like this, but it helps me alot and my eye sees discrepancies in spacing very easily and they drive me crazy. Personally, I think this level of anal retentiveness is OK... now... if I also used the Tiger Tape to measure the length of each stitch... THAT would be just a tad too anal retentive. :0)

I've finished two more seam treatments from Sharon's 100 Details in 100 Days... of course I'm behind but I'm still trucking along!

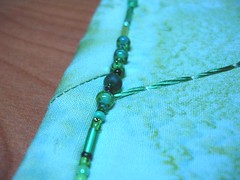
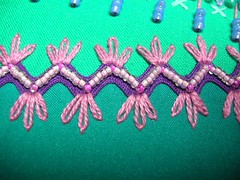
Here is Day 10:
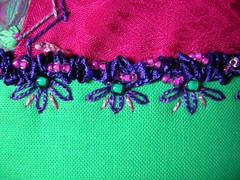
Day 10
I like this one alot... the half-circle buttonholes make a wonderful line and the addition of the extra stitches and beads really fills it out nicely. I can see many variations to the half-circle buttonholes in my future... they are fun to do and create a flowing seam treatment.

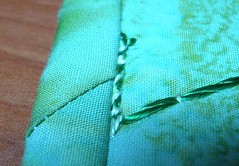
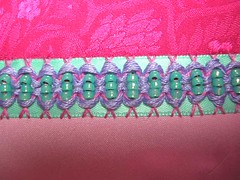
And here is Day 16:
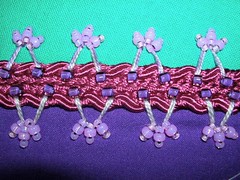
Day 16
This, I'm rather unsure of... I still don't know whether I like it or not. I can see that I made the fly stitch loop too long and I think it is too far away from the braid. I tried bullion stitches but because I was using #8 perle cotton they were way overshadowed by the loop and the braid so I used beads in place of the bullion stitches.

I really need some thicker perle cotton.
sigh
I guess I'm just gonna have to go shopping again! :0)

Monday, July 24, 2006

Tiger Tape Tutorial

Last week debbie r. asked how I got my stitches so even, and I thought I would show everyone how I do it. I use a nifty little quilting tool called Tiger Tape that I first read about on someones blog (I don't remember who's anymore). I found the tape at my local quilt store, but some of the craft stores might also carry it. I use the tape that is divided into increments of 1/8" because it's the only one I have found so far. Of course, as you can see, you can always order any variation off the web.

Here's how I use it:
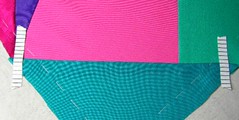
Step 1
First I position a short piece of tape on each end of the seam, making sure that a line on the tape hits the seam exactly and also making sure I get it placed at a 90° angle to the seam.

Then I add more pieces of tape:
Step 2
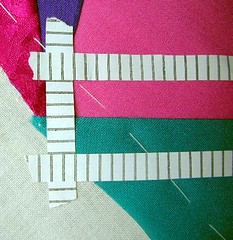
These pieces are placed parallel to the seam and lined up on a mark on each piece of tape at the ends of the seam. Here's a detail pic so you see what I mean:
Step 2 - detail
Here's where the 90° part comes in. The tape is lined up so that the marks on the tape meet up with the perpendicular piece of tape. This is done both above and below the seam so that you have a line to work with on both sides of the seam. This configuration is used when you are doing a seam treatment that moves back and forth across the seam as you stitch it.

For this seam treatment I was doing one side of the seam at a time, so I moved the bottom piece of tape up so it was close to the seam, allowing me to more easily position my needle.
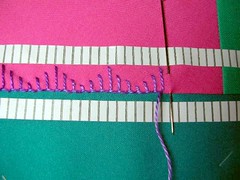
Step 3 - needle position
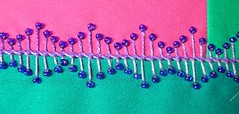
As you can see, it isn't absolutely perfect, but when it's all stitched up and I do the other side of the seam, it looks pretty good!
Finished seam
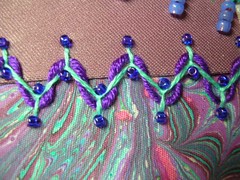
This seam was done with varigated #8 perle cotton and seed beads. Both sides were button-hole stitched and then the bottom of the stitchs along the seam were whip stitched together to even it up more. Then, the seed beads were added.

Other news:
We finally found a house that makes us feel at home and made an offer yesterday. It was accepted and we are sooooooo excited!!!! The home inspection will be this week and I'll post a couple of pictures. Of course we don't get the keys until we close at the end of August, but I'm still VERY excited!! Now comes the sorting and packing, although much of what we have is still in boxes so I'm hoping that I will have time to work on my seam treatments and blog about them.

One can always hope!!! ;0)

Monday, July 17, 2006

The Return of Needle and Thread(s)

I managed to get stitching again this weekend. It felt good to sit and concentrate on my block. Here are the seam treatments I finished:

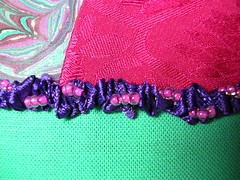
Ruched ribbon plus
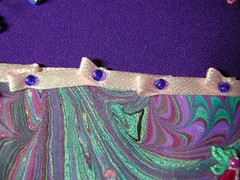
This is the ruched ribbon with an additional line of stitching along it, ala Day 16. The ribbon by itself seemed rather skimpy, probably because I used 1/8" ribbon, so I added some to it.

I also added some to the fans from Day 2:
Day 2 plus
This is just straight stitches but it beefs up the line a bit. It brings it more in line with the vision I have for this wall hanging.

Here is Day 11:
Day 11
The oyster stitches gave me fits... I'm still not sure I got them right but it was time to move on. I used #8 perle cotton and I think I need a thicker thread like Sharon B used to make them look better. Oh oh... I see an virtual shopping trip to eBay in my future... ;0)

This is a variation on Annie's Day 19:
Folded ribbon
This seam is just below the wisteria so I didn't want it to be too overpowering. I may add more to it later but for now it will stay as it is.

And this one is Sharon's Day 19:
Day 19
I really like this one... it is simple but packs alot of punch, especially when gussied up with a few beads...

And, last but not least... here is the finished Block #1:
Seams finished!
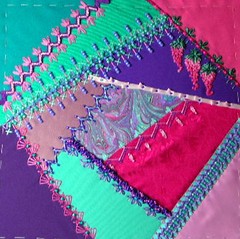
Sorry for the blurring... my camera won't go out of macro mode. Anyway, this kinda shows where I'm going with this wall hanging. It will be all about the seam treatments and nothing but the seam treatments. I'm going to use it as a sampler so all these wonderful ideas stare me in the face when I have stitcher's block.

I wonder if I can stick to this idea? Guess we'll see!

Thursday, July 13, 2006

AWOL

Sorry for being AWOL (Absent With Out Leave) this past week. It has been a trying week. When I put the final beading around the binding of my Wedding CQ I couldn't find my Nymo beading thread so I used hand quilting thread. Well, of course after I finished I found the beading thread so... I spent several days going all the way around the beaded binding and sewed the beads on again with the beading thread (and the hanging tabs)... sigh... my fingertips are worn through but the freakin' beads will definitely stay put!! :0)

Then we spent most of Saturday house hunting in houses with no air conditioning (it was 108°) and it just drained us. We spent all day Sunday recovering! I also am just a tad obsessive compulsive and have been spending extra time on the computer combing through the house listings looking for that perfect home for Hubbie and me.

I hope to pick up the stitching again tonight and get back on track. I've been watching everyone else's progress and am anxious to join in on the fun again.

Pictures as soon as I have something done!!

Wednesday, July 05, 2006

Wedding CQ Finished!

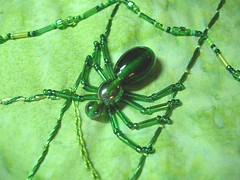
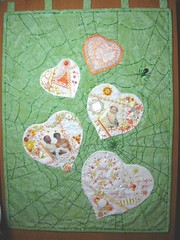
WooHoo!! There were a couple of snags encountered but all-in-all it wasn't too bad. First I added a spider, as it is my contention that all spider webs definitely need a spider...
Spider
She's pretty good size (1 3/8 inch) and fits in very well. I considered adding a mate for her; however, as spiders have a tendency to eat their mates, I thought it might be a good idea to leave it off a Wedding CQ. ;0)

Next I added the binding, curiously one of my favorite parts of quilting. I think it's because it all comes together then... you feel the weight of the quilt as it will be and watch the finished product appear before your eyes. Very satisfying! Anyway, the binding proceeded quite smoothly... for awhile. There was a small oops (or four) when I got to the point of ironing it over in preparation for the hand sewing on the back. See what I mean?
Ooops
Yes, ladies, I had a problem. (The color is way off on this picture. Sorry.) The rayon thread that I used for the radiating lines of the spider web had frayed towards the ends on some of them. To make sure they didn't continue to fray, I tacked them down REALLY well. However, as you can see, I failed to put them close enuff to the edge to be hidden by the binding. Now, prior to adding the backing and tying it all together, I had measured forty gazillion times to make sure it was nice and even, square, plumb, and not off in any way. I never even thought about making sure the binding would cover the stuff on the edges properly. SIGH

So, now I had a binding all sewn on that didn't cover what it was supposed to cover... kinda like a mini-skirt. Hee... anyway... I really didn't relish the thought of ripping out the entire binding. When I added the binding I wasn't too sure about how it would look because it kind of just faded away color-wise so I originally considered using a darker green but decided against it. Now my little oops on each edge (oh yes, at least four of them) had given me the "opportunity" to add an embellishment to the edge. So I did.
Ooops fixed
All better! I continued this mixed bead edging all around the binding and it was the perfect finishing touch. Serendipity strikes again!!
Finished!!
TaDa!! I added the tabs at the top instead of a hidden sleeve because Randy is an ornamental ironworker and will be making a special rod to hang it from so I wanted the rod to be seen all across the top of the quilt. Now to package it up and send it off. Wish I could be there when they see it!

Monday, July 03, 2006

Continuing with 100 Details in 100 Days

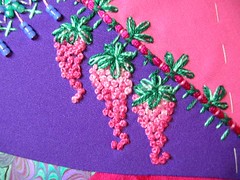
I've been picking and choosing from all the offerings floating around out in blogland and I've had a great time! Here is Day 3... at least the flower part of the detail:
Day 3
First I couched some cording along the seam, then added straight stitches below the couching, and finally the flowers themselves. The stitches in the couching, the straight stitches and the leaves are Soie d'Alger silk floss and the flowers themselves are french knots in varigated perle cotton #8.

This is my version of Day 4. It took me the longest time to figure this one out but I think I finally got it. I couldn't quite see how the herringbone back-to-back was done but after taking a good look at everyone's examples I was able to make it work.
Day 4
It gives a very clean seam treatment, don't you think? This is 5/8 inch ribbon with the herringbone stitches done in Soie d'Alger silk, as is the lacing.

Here is the finished rick rack seam treatment from Day 2. I was finally able to find some pink glass beads... unfortunately not at a new bead store because it was just too freaking hot at 110°F to go exploring! I'll go another time when it's cooler... like maybe 95°... LOL!!! Anyway... I like the way it turned out.
Updated rick rack

And last but definitely not least... Annie Whitsed's ruched ribbon from her Day 11... I love this detail, although mine is rather more contained than her's... gonna have to work on that free form a bit!
Ruched ribbon
This is done with 1/8 inch ribbon and glass beads.

I'm off work today due to the holiday weekend and the plan is to finish the Wedding Heart CQ... wish me luck!!!