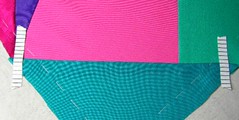
Here's how I use it:

First I position a short piece of tape on each end of the seam, making sure that a line on the tape hits the seam exactly and also making sure I get it placed at a 90° angle to the seam.
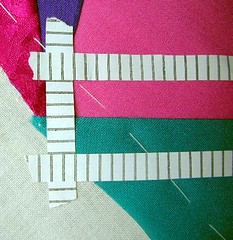
Then I add more pieces of tape:

These pieces are placed parallel to the seam and lined up on a mark on each piece of tape at the ends of the seam. Here's a detail pic so you see what I mean:

Here's where the 90° part comes in. The tape is lined up so that the marks on the tape meet up with the perpendicular piece of tape. This is done both above and below the seam so that you have a line to work with on both sides of the seam. This configuration is used when you are doing a seam treatment that moves back and forth across the seam as you stitch it.
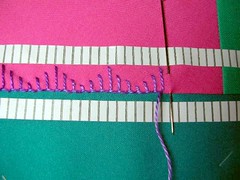
For this seam treatment I was doing one side of the seam at a time, so I moved the bottom piece of tape up so it was close to the seam, allowing me to more easily position my needle.

As you can see, it isn't absolutely perfect, but when it's all stitched up and I do the other side of the seam, it looks pretty good!

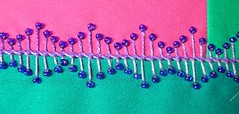
This seam was done with varigated #8 perle cotton and seed beads. Both sides were button-hole stitched and then the bottom of the stitchs along the seam were whip stitched together to even it up more. Then, the seed beads were added.
Other news:
We finally found a house that makes us feel at home and made an offer yesterday. It was accepted and we are sooooooo excited!!!! The home inspection will be this week and I'll post a couple of pictures. Of course we don't get the keys until we close at the end of August, but I'm still VERY excited!! Now comes the sorting and packing, although much of what we have is still in boxes so I'm hoping that I will have time to work on my seam treatments and blog about them.
One can always hope!!! ;0)
6 comments:
congrats on the house - hope you are very happy in it
Thanks so much for the tutorial with the tiger tape. I have never seen it used in this way, and it makes perfect sense.
Congrats on the house, too! Can't wait to see the pictures...
Tiger tape originally is used to get even quilting stitches. We asked a shop owner whether she sells it. but in her opinion it puts to much pressure on the quilting ladies becauce you won't get such tiny even stiches and that will cause frustration. :-) But I like the way you use it.
Oh! oh! oh! Thanks so much! I've never seen it used this way either and I never would have guessed it could be! WOW!
How clever - I have been looking for a solution to crooked seams forever!
Tiger tape can be very useful for repairs and strengthening.
Post a Comment